
Back to tool selection
Photoshop Color Correction
This page will guide you through color correcting Four Souls cards with Photoshop so that you end up with a file that is ready to be sent to makeplayingcards.com.
Prerequisites
- Photoshop CS3 or newer
- Four Souls card front images. e.g. from the official site or your custom cards
- Our Selective Color preset .asv file
- "U.S. Web Coated (SWOP) v2" CMYK color profile (comes pre-installed with Photoshop)
Preparing the image
- Open the image file in Photoshop (File > Open...)
- Click on: "Edit > Convert to Profile..."
- In the pop up window, choose the following settings:
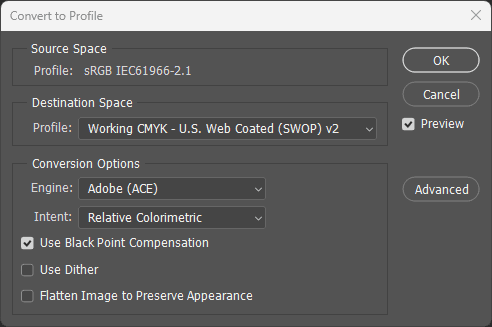
- Click OK to confirm
Applying the preset
- Click on "Layer > New Adjustment Layer > Selective Color..."
- Leave the New Layer window with defaults, and click OK
- Make sure the new Selective Color adjustment layer is topmost layer in the layers panel
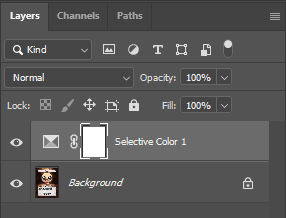
- Double-Click the Selective Color adjustment layer's icon to bring up its Properties tab
- Skip the next two steps if you've loaded in the .asv preset before.
- Click "Menu > Load Selective Color Preset…"
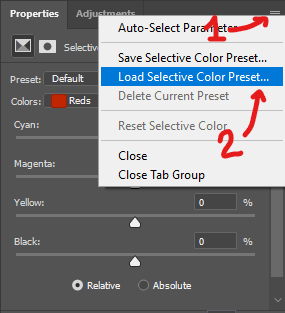
- In the new window, navigate to and select the downloaded .asv file. Click: [Load]
- Make sure that the default values have changed and that the selected preset is the one you downloaded. You should also see the image change when you hide/show the adjustment layer
Saving the new image
- Click: File > Save a Copy…
- Select JPEG as file type, and enable ICC Profile: U.S. Web Coated (SWOP) v2
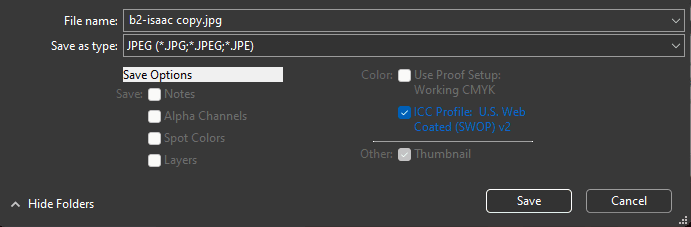
- Click [Save]
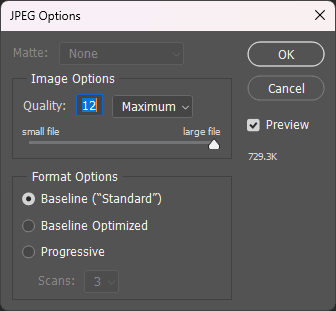
- Select the maximum available quality in the next window and click [OK]
- You're done with color correction!